Thursday, June 12, 2008

Eye cosmetics and make up


Cleanliness and hygiene should be followed when using eye cosmetics or it can lead to some infections of the eyes. It is not good to borrow or lend any eye make up and it is best to always keep your hands clean while using eye make up.

Eye Shadows

Eye shadows leave a shiny or opaque finish depending on the time of make up and shape of eyes. To achieve the perfect daytime look with eye shadow, you need to follow some basic guidelines. The basic tones you need are
(a) a pale highlighter shade for your brow bone area.
(b) a basic shade for your eyelids.
The shades you choose can be deep-toned or pale, neutral or bright, but they should be applied so that they are not too strong. Blending is important while applying eye shadow. The colour used should be appropriate to the colour of the skin and match the colour of the dress. When you use more than one shade they should be so well blended that you can't tell where one ends and the next one begins.

Forms of shadows:
Eye Shadows come in a variety of forms like pressed powders, pencils, sticks, gels or creams. Pressed powders are the most popular form of shadows. They are available in pearly and matt textures. You can get a better effect, if you apply them with a wet brush. The cream shadows are oil or wax based. It is best suited for dry lids and should be avoided on greasy eye lids. Pencils have a high colour and filling ability. Gels are suited for oily skins.

Brushes for application:
A straight - bristled brush for each colour and a round bristled brush for blending.

Application:
When you apply eye shadow, always start with the highlighter shade. Brush it just under the outer end of each eyebrow and quickly blend the colour inward toward the inner end of the eyebrow, above the inner corner of the eye. After that apply the eyelid shadow by beginning in the centre of each lid, just above the pupil of your eye. With a blending brush, make a quick back and forth motion. Finish the make up by blending upward to meet the highlighter shade.

Eye liner

Eye liners are the most extensively used form of eye make up. Eye liner is used to make the eyes more prominent and create an illusion of thicker lashes. Eye lining is done with a black or brown eye liner on the top lid of each eye and sometimes under the lower lashes. The line should be smooth instead of a harsh line.

Forms of liners:
Eye liner comes in liquids or pencil form. Care should be taken when using liquid eye liner. It should not go into the eyes. Liquid liners can be either water based or alcohol based. Alcohol based liners are water proof.

Application:
To apply liquid eye liner, draw the brush out of the bottle or tube and stroke it against the mouth of the tube to remove excess liquid and taper the brush to a fine point. Using the very tip of the brush, stroke the eyeliner evenly across the lid as close to the base of the lashes as possible, beginning with the inner corner of the eye and continuing to the outer corner of the eyelid. Apply the line in several short brush strokes.

Indians have our own indigenous type of eye make up -kajal. Home made Kajals does not contain any chemicals.

Eye defining pencil

Eye defining pencil adds definition and a hint of colour to the bottom of each eye. It is available in variety of colours. The pencil should have a fine point and a medium to soft lead so it glides on easily under the lower eyelashes.

To apply eye defining pencil, lightly stroke a single, fine line under the lower lashes starting at the outer corner of the eye. The line must be close to the base. Run the pencil smoothly under the lashes along each lower eyelid to the inner corner of the eye. Then use an angles brush or a cotton swab to soften and blend the line. Eye defining should be never be a hard, thick line.

Eye brow Pencil

An eyebrow pencil emphasizes the eye brows, improves their shapes and makes them look thick. The colour of the eyebrow pencil should never be darker than that of your brows or hair colour.
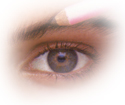
To apply eyebrow pencil, brush your eyebrows with a eyebrow brush to remove excess foundation or face powder. Then with outward brush strokes, smooth the hairs in the direction in which they grow. To shape your brows properly, begin by using short, light strokes of the pencil to outline the top of each eyebrow up to its arch. Use featherlike strokes to extend each brow to the end. Fill in any sparse areas by using these same strokes. Then brush your brows with an eyebrow brush to smooth them and blend in the pencil strokes.

Mascara

Mascara thickens the eye lashes and increase attractiveness of the eyes and emphasize them. It gives the eye make up the finishing touch. Brush the lashes, apart from application. Light coats are better than thick ones.

Forms of Mascara:
There are 3 different forms of Mascara - water based, water proof and the mixed variety. Mixed variety is the the most useful one. Water based mascaras can be applied quickly and removed easily. So they are gentle to the lashes and eyes. But they won't stay for a long time, as the mascara smudges easily when it comes into contact with water, tears and perspiration.
Water proof variety stay for a long time and is water proof and smudge proof. They are a good investment as they are resistant to contamination and can be used even years after they have been manufactured. But it takes a long time to dry and is difficult to remove the liner. The mixed variety is a combination of water based and water proof mascaras. These dry quickly and is easy to remove.

Application:
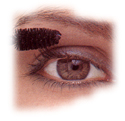
Apply mascara by looking straight into the mirror, with your chin lifted slightly so you can see your lashes clearly. Gently twist the spiral brush as you withdraw it from the masara bottle. Stroke your upper lashes evenly from their base to the tips, curling them upward with the brush as you apply the mascara. Apply mascara to the lower lashes with downward strokes, wiggling the brush back and forth a bit to separate the lashes. After you have applied the mascara to both eyes, you can repeat the application to add more fullness to your eyelashes.

Under eye concealers: They are intended to hide blemishes and dark circles under the eyes. Application of make up above them, does not remove them.
FOUNDATION

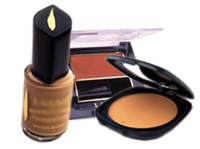
Foundation should be considered as a skin improver. Foundation should match your skin tone. To choose a colour apply little on your cheek or inside of your wrist. Be careful to blend around nose and chin and fade away under the chin. Heavy foundation is old fashioned and ageing. Foundation should never appear like a mask. The shade chosen should be as close to your natural skin tone, so that there is no sudden change of colours between Chin and neck.

Different types of foundation

Foundations are available in various forms liquids, gels, creams, solid creams, in sticks (pen stick), cakes (pancakes). This can be chosen depending on how much clarity or cover you prefer.
Emulsions : These are packaged in tubes and are formulated for a variety of skin types- for dry skins, oily skins and normal skins. This gives less sheen than cream or liquid foundations, but cover blemishes very well.

Creams: These are packed in jars. As they contain a high proportion of oils, they are particularly suitable for dry skins. These also provide a heavy cover, but gives a glossy finish.

Liquids: These are packaged in bottles and can be formulated for all skin types. They give a light sheen cover but are too light to cover any blemishes and scars.

Gels : These are packaged in squeeze tubes. They give a light, natural look and are the variety you should use if you have a blemish free normal skin.

Cakes or sticks : These are the solid forms of foundation. Since they have a drying effect, use them on an oily skin. They hide blemishes and scars. Solid forms are popular for photographic and stage work but are too heavy for every day use.

Powders : The original full coverage face-powders have now given way to transparent powders; these transparent powders control shine and provide oil - blotting. They are used after foundations to give a matt finish. Cake or compact powders are more heavily formulated; as they contain a certain amount of foundation. These are not the best choice for the initial powdering over foundation because they may rub the foundation off and also cause an unattractive colour build-up. They are best used for touching up during the way, as they help to reinforce coverage.

Choice of a foundation

Two aspects should be taken into account before choosing a foundation - the form of the foundation and its colour. Some forms are more suited to certain skin types than others. Age and the basic condition of your skin also influence the choice of the foundation.

Choice based on the skin type:

An oil based foundation is most suited for dry skin as this gives additional moisture. An oil -free, water based foundation (Cake or stick form) is most suited for oily skin. Any form of foundation is suited for the normal skin type especially, Emulsions and liquid foundations which can be used for any skin type.

Choice based on age and condition of skin :

For young and fine skin, a thin foundation (light sheer liquids) is most suited. For a skin with uneven colour and tone, blemishes etc a heavy foundation (cream of stick) is suitable, to cover the poor condition of the skin. For older skin, 2 coats of light liquid foundation is suitable- a heavier foundation may emphasize the lines and skin creases.

Choice based on Colour :

A make up base or foundation must match the natural skin tone of the person as much as possible. This colour matching is best done in day - light and not in artificial light. A fair skin can use Beige, brownish gold or ochre and darker skin can use pinkish beige, peach or pinkish ochre. If there are more than one colour tone in your face, then match the foundation to the middle tone. Mixing two colours -one which matches your skin and the other which complements your natural colouring could have very good effect.

Powder

A shade close to your skin colour should be used. Powder is not really meant to add colour, but it helps to add a smooth finish. Apply with a bushy brush or with cotton and dust off excess powder.

Blusher or Rouge

After facial make up, the next thing that comes on the face is the blusher. Blusher can be in powder form as well as cream form. The colours should not be very much darker than your skin tone. Smile widely with your lips closed. Your cheek naturally raise; apply rouge on the raised area and fade out gradually towards the hairline. Never apply rouge too close to the nose and too low on the cheeks.

For pimples

For Black Spots

For Glowing skin

  • A facemask of egg white and honey gently removes the tan from your face.
  • Mix oats with honey, yogurt and ground almonds. Apply this in your face, leave it for five minutes and wash with lukewarm water.
  • Cucumber is a natural cleanser. Mix cucumber juice with milk and use it instead of a cleanser.
  • Take 1/3-cup cocoa, three teaspoons of heavy cream, 1/3-cup ripe papaya, 1/4-cup honey and three teaspoons of oatmeal powder. Mix it all together. Apply on your face. After 10 minutes, wash your face with warm water. This is best for oily skin
  • For oily skin, apply a mixture of grapes, lemon and egg white. Leave it for 20 minutes and rinse with warm water. While lemon acts as a natural cleanser, grapes will soften your skin and egg whites will tighten it. Don’t be alarmed if your skin tingles.
  • Cut the lemon and rub the wedge all over your face. Leave it for about 20 minutes, then rinse off with cold water. This will refresh your face. Avoid doing this if you have dry skin.
  • Mix honey, lemon and vegetable oil .This mixture is a good moisturiser for dry skin. Apply this mask for 10 minutes.
  • Apply the mixture of honey and milk on the face . This will make your skin glow.
  • Prepare a mask by mixing a slice of pumpkin with egg yolk and milk. Let this mask set on your face for 30 minutes for a glowing skin.
  • Mix half-a-cup honey to your bath water for soft and smooth skin.
  • For a soothing body pack, prepare a paste of mint leaves and almonds. Mix it with warm water and apply all over your body. Leave it till it dries and rinse with warm water.
  • Buttermilk dabbed on skin for 15 minutes will soak up oil from your skin without drying it.
  • Carrot juice applied daily fades blemishes.
  • For dark underarms and neck apply lemon juice mixed with cucumber juice and a pinch of turmeric daily. Leave this on for 20 minutes.
  • For removing facial hair.. Apply a sticky paste of egg white blended with sugar and corn flour. When it dries, gently peel it off. Repeat this three to four times a week.
  • Thin apple slices rubbed onto oily skin will help in controlling oily shine.
  • For supple skin, apply a ripe smashed banana on your face for 20 minutes daily.
  • Cauliflower juice applied on warts regularly will make them fall.
  • For a fair skin, try this natural bleach. Mix orange peels (sun dried and powdered) with milk. Apply this paste for 25 minutes and wash off.
  • Mix half teaspoon dried curry leaf powder with multani mitti (fullers earth) and apply on the face. Wash it after it gets dry.
  • Apply the mixture of tomato juice and honey on the face and neck , wash it after 15 minutes.
  • Apply the mixture of carrot juice and basin. Leave it till it dries and wash the face.
  • Add two teaspoon of tomato juice with 4 teaspoon of curd and apply on the face.
  • Add a pinch of yeast with 2 teaspoon of cabbage juice and apply.
  • Mix 1 table spoon of barley powder with half teaspoon of lime juice and 1 teaspoon of honey. Apply it on the face and wash after 20 minutes.
  • Mix pineapple juice and carrot juice together and apply it on the face and wash it after 15 minutes.
  • Mix vinegar and rose water in equal quantities and apply.
  • Mix curd and cucumber juice and apply it on the face.
  • Apply the mixture of coconut water and thick pineapple juice.
  • Make a paste with 1/2 teaspoon of milk powder, 1/4 teaspoon of egg white and 1/2 teaspoon of lemon juice and apply on the face.
  • For dry skin, Make a paste with egg yolk, olive oil and lemon juice. Apply it on the neck and face, wash it out after 10 minutes.
  • For oily skin, take a mixture of oatmeal and egg white and apply it on the neck and face
  • For glowing skin, use basin or green gram powder mixed with milk instead of soap.
  • Apply the mixture of raw turmeric and cream of milk on the face and wash it after 20 minutes. It will make your skin fair.
  • Apply the mixture of honey, basin, cream of milk and olive oil as a face pack.
  • Apply the paste of fenugreek with milk on the face and let it dry. Wash off with luke warm water.
  • Make a paste of red sandal wood and apply it on the face every day for glowing skin.

  • Make a paste with red sandal powder and coconut milk and apply on the face for soft skin.

Lip Care

  • You can mix one-tablespoon cranberry sauce juice with two tablespoons Vaseline for a delicious home made lip balm.
  • Apply the juice of lemon skin for avoiding black colour of lips
  • Massage your lips with coriander leaf juice for soft and rosy lips.

Eye care

body care

  • Mix six-teaspoon petroleum jelly, two-teaspoon glycerin and two-teaspoon lemon juice. Apply this moisturizing lotion at least twice a week if you have dry and flaky, arms and legs
  • Peel and grate a cucumber. Squeeze the juice to this, mix half-a-teaspoon glycerin and half-a-teaspoon rose water. Apply this on sunburns, leave it for some time.
  • If you have cracked heels, melt paraffin wax; mix it with little mustard oil and apply on the affected area. Leave it overnight. After 10 or 15 days, your heels will become smooth.
  • Massage your body with a mixture of coconut oil and any of your favourite scented oils like lavender or rosemary.
  • For rough palms, use a mixture of glycerin and limejuice in equal proportion.
  • For cracked heals, massage the foot with coconut oil and keep the foot in warm water for some time. Wipe the water off the feet and apply a mixture of hibiscus flower(10), Henna (1 handful) and juice of half a lemon. when dry wash it off.

  • Remove scars on your hands and feet by rubbing them with lemon peel.

How Makeup Should Be Worn

There are some general rules on how makeup must be worn on different parts of the face. Find out what celebrity wears makeup properly and get inspired by them!

Face
How to apply makeup foundation

Clean face with your favorite lotion to remove any impurity, then use a very good moisturizer all over your skin and give it a time to settle in. Makeup will look flawless if you’re applying concealer to camouflage imperfections and will balance out complexion by hiding out blemishes and under-eye circles.

Use your fingertips to apply small amounts of concealer around the eyes, nose, chin and the center of your forehead.
Pick up small amounts of foundation with a thick brush or sponge and gently brush forward until it’s completely blended into the skin. The look you want to get it’s an even, smooth canvas. Just remember, when applying foundation, the main idea is not to cover the skin – is to give it an even color, without looking heavy.

She wears it best:
Rachel Bilson
– She looks always fresh because she applies the base and foundation evenly. Rachel prefers hydrating products that promote that super healthy glow to the skin.

Cheeks
How to apply blushes

The blush-brush will be too loaded at the first application, so the most important thing is to shake or blow off the excess and use a popping technique while applying it. This will create a natural flushing look, the color will just gently and slowly come forward on the skin. Smile while applying the blush.

She wears it best:
Sienna Miller
– She’s always acquainted with the latest trends in makeup. Sienna’s cheeks define a look that’s really fresh and healthy glowing.

Eyes
How to apply eye shadows and mascara

If you want small eyes to look larger, use a neutral shadow on the mobile lid (the idea is that light shades brighten the eye) and apply a darker shade in the crease. Use eyeliner avoiding the inner corners.
If you want big eyes appear a bit smaller, use a darker warm shade in the mobile lid (dark shades of eye shadow effectively create a closing effect). Stick to pencil eyeliners – liquid ones tend to be too heavy on pronounced eyes.
If you consider that your eyes are closer together, you can create the illusion of being apart by using a darker shade, stroke it outward and slightly upward from the middle part of your lid to the outer half of your lid. Apply mascara by wiggling the wand at the base of the lashes and then pull up. Also, don’t over exaggerate your brows, keep them nice and soft – you don’t want them rigid looking – you want just as slight bit of a whispy look that soften the eyes.

She wears it best:
Rihanna
– She doesn’t step aside from wearing bold eye makeup, even if her skin tone is pretty fastidious. We don’t know if she does her own makeup, but she certainly can carry off ultra glam looks.
Lips
How to apply lipstick

Before applying lip liner and lipstick, moisturize with lip balm. Then, if you want your lips to appear more pouty, use the lip liner the same color as your lips to accentuate your "cupid's bow."
Using a lip gloss that’s shade has a slight iridescence and letting it creep up to the crest of the lip can give the illusion of a fuller mouth. But this requires a very light touch.
If you want your “kissies” appear smaller skip lip liner, but if you like to have those looks then soften edge with your finger. Give the finishing touch to your makeup with luscious, brightly colored lips.

She wears it best:
Megan Fox
- The foxy actress’ eye makeup is kept minimal and simple, leaving lips overpower her lam look.

Is Honey Beneficial For The Skin?

Years ago honey was commonly used as substitute for sugar or a flavor enhancer but during the past 10 years it has become a main ingredient in one of the best skincare products and makeup products. Nowadays honey is widely used as medicine to treat allergies, anemia, fatigue and exhaustion, poor digestion etc. Due to its properties today honey is one of the main ingredients in many moisturizing and nourishing body lotions and makeup products.

Honey contains glucose, fructose, minerals - magnesium, potassium, calcium, sodium chlorine, sulphur, iron, copper, zinc, vitamins B1, B2, B5, B3.
Natural honey is very beneficial to the skin as it has the ability to attract water and to nourish the skin deeply. During the last years many of the biggest cosmetic and skincare companies began to use natural honey in many body lotions, facial moisturizers, anti-aging creams and serums, facial masks, cleansers, shower gels due to its ability to retain and attract moisture. Many women prefer to use honey and another natural ingredient for home-facials as it rejuvenates the skin and nourish the skin deeply. Honey is also a natural antiseptic as it contains many antimicrobial agents that kill bacteria immediately.


What are the benefits of honey to the skin?
  • Honey is safe for very sensitive or irritated skin
  • Honey eliminates wrinkles and fine lines
  • Honey rejuvenates the skin
  • Nourish the skin deeply and prevents infections
  • Pure honey doesn?????t irritate the skin or cause allergies
  • Honey helps attract and retain moisture and prevents skin dehydration
  • Honey leaves skin smooth and supple
  • Honey brightens dull skin and prevents skin discolorations
  • Honey acts as a real antioxidant and fights free radicals
  • Honey treats and prevents pimples, skin discolorations and fights acne
  • Honey is beneficial to treating wounds, sores and burs
  • Honey restores damaged skin
  • Honey leaves skin soft, soothe and younger-looking
  • Honey helps renew skin cells
  • Honey treats acne, eczema and other skin conditions as it contains amino acids and enzymes
  • Honey fights against skin damage and ageing due to its antioxidant properties


We recommended you some of the best skincare products with honey:
Is Honey Beneficial For The Skin?  perlier-honey-vanilla-cream_3a5dc7181 body
Perlier Honey Bath & Shower Cream - Honey Cream Bath is specifically formulated for the bath or shower, enriched with the sweetness of Honey, this soothing action leaves skin luxuriously soft and smooth.
Is Honey Beneficial For The Skin?  loccitane-honey-and-lemon-eau-de-toilette body
L?????Occitane ??oney&Lemon Eau de Toilette - This sparkling and delicious Eau de Toilette has a subtle blend of fresh and sugary-sweet notes. The lemon and citrus fruit scent give it a tangy freshness, and golden honey, vanilla and caramel scents give its delectable sweetness.
Is Honey Beneficial For The Skin?  lancome-nutrix-body-royal body
Lanc??me Nutrix Royal Body ????? this nourishing body cream instantly relieves uncomfortable tightness and smooth the roughness caused by extreme dehydration. Repairs the appearance of dry and very dry skin with ROYAL LIPID????UM?????, nurtured and moisturized, skin feels silky smooth, soft, and comfortable.
Is Honey Beneficial For The Skin?  estee-lauder-re-nutrive body
Estee Lauder Re-Nutriv - This extraordinary creme transforms your skin inside out. Keeps skin in optimal moisture balance via constant hydration. Prevents breakdown of elastin and collagen in skin. Minimizes the appearance of fine lines and wrinkles. Helps skin regain its firmness, elasticity and vitality. Visibly refines skin texture and appears smooth, luminous and younger.
Is Honey Beneficial For The Skin?  leonor-greyl-bain-traitant-a-la-propolis body
Leonor Greyl Bain Traitant a la Propolis - Gentle anti-dandruff shampoo with Propolis. Great for all irritated, itchy scalp conditions. Contains theraputic, bacteriostatic, and anti-microbial agents. Contains Propolis, Plant Extracts, and Essential Oils. Does not contain Coal.
Is Honey Beneficial For The Skin?  helena-rubinstein-prodigy-tissular body
Helena Rubinstein Prodigy Tissular - A cream that provides skin with the youthful benefits of beauty sleep. As if ‘rewoven’, skin is firmed up, smoother, more even and luminous.With Bio-Matrix????? (association of plant tissues?????extracts in their embryonic phase : Japanese Cedar Bud and Indian Vigna Seed) + Quintessence of Bio-Sap
Is Honey Beneficial For The Skin?  nuxe-facial-cleansing-gel body
Nuxe Facial Cleansing Gel - a soft, rich gel made from a vegetal origin base that gently cleanses the face while maintaining the balance of the skin. Honey and peach extracts soften - lime-blossom extract soothes and relaxes - walnut extract tightens the pores while ginseng extract tones and firms. For all skin types.
Is Honey Beneficial For The Skin?  clarins-eau-dynamisante body
Clarins Eau Dynamisante ????? moisturizing body lotion that offers all the fragrant and treatment benefits of plant extracts. Promotes a feeling of freshness and vitality. Moistures and softens skin immediately.
Is Honey Beneficial For The Skin?  nuxe-honey-lip-balm body
Nuxe Honey Lip Balm - Soothes, repairs, nourishes, softens and heals chapped lips. Reduces lines of lip contour.Contains Honey, Shea Butter, Rosa Mosqueta, Calendula and Almond, Oils Vitamin E, Beeswax,Soy ,Lecithin, Allantoin Grapefruit, Sunscreen.
Is Honey Beneficial For The Skin?  apivita-%d0%b5xpress-skin-food-face-mask body
Is Honey Beneficial For The Skin?  loccitane-honey-and-lemon-sweet-sugar-scrub body
L’Occitane Honey and Lemon Sweet Sugar Scrub - Enriched with pure honey from Provence and lemon peel powder, this delightfully textured sugar scrub gently exfoliates your skin, leaving your body feeling soft and silky. The skin is radiant, satiny and deliciously perfumed with the Honey and Lemon scent.
Is Honey Beneficial For The Skin?  burts-bees-thoroughly-therapeutic-honey-shea-butter-body-butter body
Burt’s Bees Thoroughly Therapeutic, Honey & Shea Butter, Body Butter - This naturally therapeutic, lush body butter combines Honey, a natural humectant to deeply moisturize, and Shea Butter to nourish and protect dry, overworked skin. Enriched with emollient Mango Butter to further moisturize and regenerate skin cells, Aloe to heal, and vitamin E to soothe. Long-lasting, therapeutic moisture for naturally soft, smooth, and healthy skin.
Is Honey Beneficial For The Skin?  korres-thyme-honey-cream body
Korres Thyme Honey Cream - A 24-hour moisturizing cream enriched with Thyme Honey, for normal and dry skin. Improves skin elasticity and contains powerful antioxidants, which protect skin from premature aging due to environmental factors.

Home Mask For Weak And Dry Hair

Home Mask For Weak And Dry Hair  home-mask-for-weak-hair hair
A good remedy for weak and dry hair is the hair mask with lemon juice. You will need: 2 tbsp. castor oil /or almond oil/, 1 tbsp. fresh lemon juice and 1 tbsp. honey. Add the honey and the castor oil to the lemon juice. Mix all the ingredients well and apply the mixture generously first to the roots and then to the entire length of the hair. Wrap your hair with a towel. Leave the mask on for approximately one and a half hour. Use gentle shampoo and wash your beautiful hair. Do the mask twice to achieve best results - the mask will nourish and hydrate your hair deeply, while making it appear healthier and more shining.

Shape Eye Brows with Threading, Waxing and Plucking with Tweezers

Eyebrows are tricky creatures. You know how they’re supposed to look, but sometimes they don’t want to cooperate, and because they’re growing out of your head, they have a semi permanent character that defies wishes and good intentions.

Susie Q Eye Make-upOne of the many problems of eyebrows is the fact that if they aren’t the right color, they can either dominate your face or disappear entirely. Their unfortunate (but necessary) proximity to your eyeballs makes it a pretty major no-no to just sweep the haircolor across each brow and hope it doesn’t drip into your eyes. That’s why the goddess of practical beauty created the eyebrow pencil, an unsatisfactory solution, but sometimes better than nothing if your eyebrows happen to be very pale.

Proper Beauty Tools Make Eyebrow Shaping a Breeze


Eyebrow Shape and TweezingPlucking the perfect eyebrow shape can be a stressful task because no one wants painful, over tweezed brows. Follow the lead of to make up artists and get the right tweezers and eyebrow care beauty tools. For very little money you can get the same eyebrow tweezers most professional salons use.


Shaping Your Eyebrows: How to get the perfect arch shape

Shape is also crucial, and if your eyebrows are coarse, creating and maintaining the ideal shape is difficult because pulling out individual hairs can leave large gaps, or severely shorten the length of a brow if you happen to pull out the half-inch hair on the very end.

The perfect eyebrow starts above the inside corner of your eye (over the tear duct), and ends at the outside corner, above your eyelashes. Eyebrows should have an arch: in nature, it’s rarely where it should be, which is a frustrating commentary on standards of beauty. Ideally, the arch happens over the iris, the colored part of your eye. It should be gentle, so if you’re planning to reshape your arch, take it very, very slowly. Do a hair or two a day, and err on the side of caution. Hasty plucking can give you a surprised look that lasts for weeks.

How to Pluck Eyebrows with Tweezers: The Do's and Don'ts

Many women pluck their eyebrows with tweezers. Some wax them, but wax is tricky because it’s hard to get an accurate shape. And some go to a hair removal salon to try "threading." Although threading is newly popular in the United States, it is a centuries-old technique of hair removal practiced in India. The eyebrow experts say never, never to pluck your eyebrows from above, but always to pluck from the bottom of the brow. I say, if you have some wild or stray or bushy hairs growing above your brows, feel free to pluck them. I did it once, and nothing bad happened to me.

I read somewhere that it’s okay to trim your eyebrows. I think this is good if the single hairs are long and thick. You can pluck some hairs and trim the others, brushing them up, evening the ends (be careful not to trim too much!), then brushing them down checking again and again as you go along.

Use Eyebrow Gel to Keep Your Brow Shape Neat after Tweezing

Finally, keeping your brows neat can be done with special eyebrow gel, or you can use a little hair gel to smooth them and keep them shapely.

Wednesday, June 11, 2008

Beauty tips by Deepika


Deepika Padukone ( TOI Photo) More pics
Deepika Padukone talks about her tried and tested health and beauty tips

Flawless skin fundas

I am not much of a make up user and stick to the basics like moisturiser and lip balm. I also do not go for regular facials but I do indulge in clean ups once in a while. Almost as a ritual, every week I like to luxuriate in a relaxing body massage with lukewarm coconut or baby oil. It relaxes and rejuvenates me like nothing else.

Water the wonder potion

Water acts like a miracle to flush away all the toxins from the body and I do not mind drinking gallons of it. It keeps the skin supple. I have also heard that a glass of warm water with honey, taken first thing in the morning, not only cleanses your system but also helps cut excess flab.

Fitness is the key

I think working towards maintaining a healthy body should be a priority for everyone. I try and work out as often as possible; since I am regularly traveling, it becomes difficult to have a daily work out routine but whenever I hit the gym I do cardio and light weights. I have an athletic body, thanks to my years dedicated to badminton but I do concentrate on butt regions.

Golden rules of dieting

A healthy diet is like the first step towards a fit body. I take a balanced diet with carbs and proteins, and am very particular about dietary proportions. I have three main meals in a day, breakfast being the most important of them all. Since south Indian food can be heavy sometimes, I try and balance it by say, having a dosa minus the potato filling; if I am having eggs, I take only the white portion and if I have idlis I substitute coconut chutney with a pudina chutney.

Stay sexy secrets

I am a firm believer in natural mediums for skin care. One should never try to overglob any products as I think the more you fiddle with your skin, the worse it gets. Just resort to the basics of skincare and witness the splendid results.

How to Arch Your Eyebrows

Brow Power Brow Power

One of the easiest ways to achieve a well groomed look without an ounce of makeup is by having your eyebrows properly arched. I will first recommend having an initial consultation with a brow- shaping professional who will help you chose the correct arch style for you and create a look that can be easily maintained at home. Eyebrow arching is somewhat of a risky procedure. If hairs are overplucked, it can take months for them to grow back. There are many ways to shape your eyebrow. You can tweeze, wax, or shave. I've found tweezing lasts the longest, and allows for precision. So this is the way I recommend.


Instructions

Difficulty: Moderate

Things You’ll Need:

  • A good pair of tweezers
  • mirror
  • bright light or daylight
  • patience
Step1
First, you need to chose the correct shape for your brow. Your brow shape depends on the shape of your eye. The eye and the brow should look balanced.
-If you have small eyes, you should thin your brows so they don't overwhelm the eye area and detract from the natural beauty of your eyes.
-If you have a full or wide eye, your brow should be full.

Step2
Shaping Next, you need to find where your brow should go. You should
take an eyeshadow brush or pencil and hold it parallel to your nose.Where the brush meets your brow is where the brow should begin.
-To find the end of your brow, extend the brush diagonally from your nostril, following the outside edge of your toward the brow. Where the inside edge of your brush hits is where the brow should end.
-To find your arch, hold the brush parallel to the outside edge of the colored part of your eye (iris). Where the brush meets the brow is where the highest part of where you brow should be.

Step3
Now you know the shape you are going for you now want to begin the tweezing process. If you visited with a professional you should only be looking for strays that have returned. If not, began by tweezing the inner brow above the nose. Be sure to tweeze pulling each hair out in the direction it is growing in.

Step4
Tweeze the brow above the pupil of the eye to create the arch.

Step5
Continue tweezing along the brow as it tapers off in the direction of its natural flow.

Step6
Make sure all hairs in the tweezed areas are removed.


How to get the best from your cosmetics.

Using your cosmetics sensibly and with reasonable regularity, most of your cosmetics and beauty products will last as long as you want them to.

Instructions

Difficulty: Moderately Challenging

Step1
Keep cosmetics and beauty products in a cool dark place, and try to make sure that all containers are air and water tight. Heat,light,and moisture will always have a damaging effect on your cosmetics.

Step2
Air damages your cosmetics by contamination. Cosmetics in open containers are more likely to be contaminated than those cosmetics in a tube. Always make sure that stoppers and caps are completely sealed to container. By doing this safe measure it will ensure that no bacteria can circulate due to air flow into the cosmetic.

Step3
Mascara keep it to yourself. Always be selfish with your cosmetics. What I mean is do not share them even with your best friend. Bacteria is transmitted this way and to avoid infecting one another tell her or him where you bought it and that you only care about them. Bacteria and viruses are not smart enough to pick and choose who they want to invade. I have learned this lesson the hard way. I contracted conjunctivitis(Pink Eye) through using my best friends mascara. It was a painful and expensive lesson. Play it smart and safe.

How to Make Skin Glow in Minutes

Our skin is like a mirror to our health, unfortunately, not everyone is blessed with perfect pores. Additionally, not everyone is blessed with a pocket book to pay for expensive beauty products. Whether you have a big event coming up or simply want to improve the look of your skin in general, a few simple tips can make your skin glow in just a few minutes.

Instructions

Difficulty: Easy

Things You’ll Need:

Step1
Begin with a soothing 15 minute facial steam that will help to open and cleanse your pores. Boil a pot of water and place a heaping spoonful of the herb of your choice in the water. For oily skin, choose peppermint or thyme, for sensitive or dry skin chamomile is the perfect choice and for normal skin, try rosemary or lavender. Remove the pot of water from the stovetop and place your head a comfortable distance from the top, covering your head with a towel. Remember to wash your face with a mild soap and lukewarm water before beginning.

step 2
Remove dead skin cells immediately after steaming to make your skin glow. Dead skin cells not only give your skin a lifeless tone, they also build up and clog pores, causing acne. There are many exfoliating products on the market which include apricot shells, sand and other products; however, a natural loofah works just as well. Massage your face with your chosen product for two to three minutes and then rinse with lukewarm water.

Step3
Mix honey with just enough flour to make a paste and then add a squeeze of lemon juice to make the perfect mask. Honey has natural antifungal properties which will help to fight acne and moisturize the skin, while lemon will further combat blackheads and help remove any extra dead skin cells. Make your skin glow by applying this mask directly after exfoliating, leaving for about 15 minutes before rinsing.

Step4
Wash your face with warm water and pat dry. For the final touch for your glowing skin, apply a very small amount of olive oil to your fingertips and massage into your skin. While it may seem that olive oil will aggravate problem skin, the opposite is true. Olive oil is a powerful natural moisturizer with antioxidant properties which not only protects, moisturizes and nourishes your skin, it also helps fight acne.

How to and Why you should Moisturize Your Face

There are many people out there that do not properly clean and moisturize their faces. This is so important because your face gets hit in so many ways everyday. Ie; The sun, wind, your hands, dirt, and oil just to name a few. Think about this: If you take a wet wash cloth and put it out in the sun what is going to happen to it??? It will dry up and get hard. If you take that same wash cloth, wet it, and put it in a plastic bag out in the sun what happens. It stays wet. This is a great example of why it is so important to moisturize your face every day and night.

Instructions

Difficulty: Easy

Things You’ll Need:

  • Face Cleanser
  • Day/Night Time Moisturizer
  • Moisturizer
  • Water
  • Wash Cloth
Step1
First you need to find yourself a really good cleanser. I suggest Mary Kay’s Time Wise 3-In-1 Cleanser. It cleanses, exfoliates and freshens all in one step.

Step2
Next you should use a day time or night time moisturizer. Again, Mary Kay has a really good product in the Time Wise line that has a day time moisturizer that has UVA/UBV blockers and an ingredient that helps to relax expression lines.

Step3
For your final step you need to cover the day or night time moisturizer with another moisturizer. Mary Kay has an age-fighting moisturizer that helps to hydrate your skin for up to 10 hours.

How to Make Your Lips Soft and Smooth

Make sure your lips are ready for all the reds and other bright colors of lipstick by exfoliating.

Instructions

Difficulty: Easy

Things You’ll Need:

  • Warm water
  • Sugar
  • Small dish
  • Washcloth
  • Medicated lip balm
Step1
Check your lips: Are they looking rough? Not a problem, we’ll get those puckers looking wonderful! First run tap water to get warm water.

Step2
Get about 1 tbs. of white sugar and put it in your small dish.

Step3
Get enough warm water in your dish to make a paste with the sugar and mix it up with your finger.

Step4
Get ready to exfoliate! Take your sugar mix and gently rub it on your lips with your finger. Don’t lick it off ... I know you want to, but you should rub for at least a few minutes.

Step5
Take a warm washcloth, and gently wipe it off your lips. Feels great, don’t it?

Step6
Go right ahead and throw on the reddest of red lipsticks and love your lips

How to Apply Lip Gloss

Lip gloss is a versatile beauty product. It can be used to enhance the shine and color of lipstick, or it can be used alone to add a bit of polish to a natural makeup look. Modern glosses are easy to apply, handy to carry, and they come in a wide variety of colors and textures. Careful application of lip gloss highlights the lips without making them look sticky or sloppy.

Instructions

Difficulty: Easy

Step1
Exfoliate your lips lightly with a soft, clean toothbrush or damp washcloth if they are dry, flaky or peeling. This gives you a smooth surface on which to apply your lip gloss.

Step2
Apply your base color of lipstick, if desired. Lip gloss can be used over basic lipstick if you want a deep color with a lot of shine.

Step3
Load lip gloss from the tube or pot onto a wand or makeup brush. A wand is convenient on-the-go because it stores in the lip gloss tube, but a makeup brush designed for lipstick or lip gloss is more precise.

Step4
Begin in the center of your lower lip. Apply the gloss in short strokes until the natural line of your lips has been filled.

Step5
Repeat steps 3 to 4 until you have achieved the level of coverage and shine you desire.

How to Choose the Best Lipstick Color

Choosing the lipstick color that suits you best can make all the difference in whether your makeup makes you look overdone, washed out, or like a more beautiful version of you. However, many women have a difficult time choosing their best lipstick color.

Things You’ll Need:

  • Tester lipsticks
Step1
Determine whether you have fair skin, medium skin, olive skin or dark (brown or black) skin.

Step2
Use your skin tone to determine which shade of lipstick will look best on you.

Step3
If you have fair skin, choose deep plum and wine reds with a blue undertone, light browns or beige with a pink undertone, or light shiny pinks with blue undertones.

Step4
If you have medium skin tone, choose deep browns, deep reds with blue undertones, warm reds, medium browns with pink or yellow undertones, deep, rich pinks, and pinks with brown undertones.

Step5
Choose deep and rich browns with reddish or mahogany undertones, dark berry shades, and rich and dark pinks with yellow undertones if you have yellowish or olive skin.

Step6
Choose dark reds with blue undertones, deep plums, any shade of brown, soft sheer pinks and beige shades, and deep berry shades if you have dark skin tone.

Step7
Wear lighter and glossier shades if you have thinner lips, as they generally make thin lips appear fuller. Dark lipsticks will make your thin, small lips even thinner and smaller.

Step8
Wear darker, matte lipsticks if you have very full lips.

Step9
Wear deeper, darker or bolder lipstick colors and shades with light eye makeup.

Step10
Wear a lighter or more neutral lip color to complement heavier eye makeup.

Step11
Wear lighter and more neutral colors of lipstick with a matte or cream finish during the day (at work, for example), and save your darker, glossier and more dramatic colors for a night on the town.